I will tell you how to make a Dropdown menu using the react state method, which is a Javascript library. Dropdown menus are usually used in Deciphering operations, search operations, and menus located in the header field. There is also a component related to this in the Bootstrap library, but I will tell you how you can make a dropdown menu with React state management without using a css library in any way. Let’s start.
Let’s create our project first…
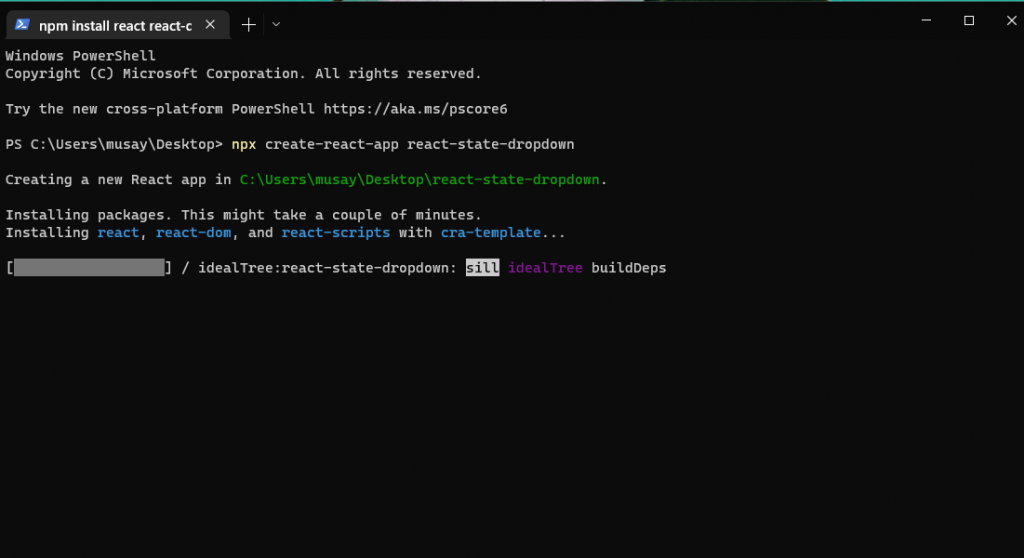
Let’s open our terminal line. Then let’s run the following command. The project may take 1-2 minutes to set up.
npx create-react-app react-state-dropdown
cd react-state-dropdown : Used to enter the folder in the terminal.
npm start : Used to run the project.
code. : Used to open the found directory in the vscode program.
Let’s open our project in the vscode program with the help of the above commands. Then let’s run our project with the npm start command.
The first time the project runs, React’s default template will appear. I did a little cleaning on some files. I am sharing these changes with you below.
App.js
import React, { useState } from "react";
import "./App.css";

const App = () => {
  return (
    <>
      <h1>React State Dropdown</h1>
    </>
  );
};

export default App;
App.js deleting the codes that came as default in js de return, I made the edit as above. In October, I imported the use State idea from the react library.
App.css
App.css, I deleted all the code contained in the file. We will add this file code again while doing the project.
Dropdown Design
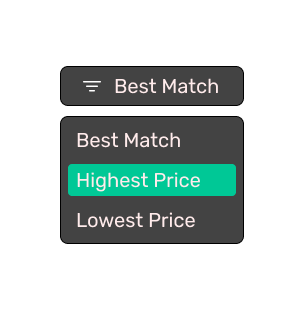
Before starting the project, I did a simple dropdown menu design on the figma program..

Let’s Move on to Coding…
I am coding the design I shared above. For this, I am sharing the changes I have made in App.js, App.css files below.
App.js
import React, { useState } from "react";
import "./App.css";

const App = () => {
  const [status, setStatus] = useState(false);
  const [dropdownText, setDropdownText] = useState("Select an option");
  return (
    <>
      <div className="container">
        <h1>React State Dropdown</h1>
        <div className="dropdown">
          <div
            onClick={() => {
              setStatus(!status);
            }}
            className="dropdown-button"
          >
            <span className="dropdown-icon">
              <svg
                width="24"
                height="24"
                viewBox="0 0 24 24"
                fill="none"
                xmlns="http://www.w3.org/2000/svg"
              >
                <path
                  d="M9 16.75C9 16.5511 9.07902 16.3603 9.21967 16.2197C9.36032 16.079 9.55109 16 9.75 16H14.25C14.4489 16 14.6397 16.079 14.7803 16.2197C14.921 16.3603 15 16.5511 15 16.75C15 16.9489 14.921 17.1397 14.7803 17.2803C14.6397 17.421 14.4489 17.5 14.25 17.5H9.75C9.55109 17.5 9.36032 17.421 9.21967 17.2803C9.07902 17.1397 9 16.9489 9 16.75ZM6 12.25C6 12.0511 6.07902 11.8603 6.21967 11.7197C6.36032 11.579 6.55109 11.5 6.75 11.5H17.25C17.4489 11.5 17.6397 11.579 17.7803 11.7197C17.921 11.8603 18 12.0511 18 12.25C18 12.4489 17.921 12.6397 17.7803 12.7803C17.6397 12.921 17.4489 13 17.25 13H6.75C6.55109 13 6.36032 12.921 6.21967 12.7803C6.07902 12.6397 6 12.4489 6 12.25ZM3 7.75C3 7.55109 3.07902 7.36032 3.21967 7.21967C3.36032 7.07902 3.55109 7 3.75 7H20.25C20.4489 7 20.6397 7.07902 20.7803 7.21967C20.921 7.36032 21 7.55109 21 7.75C21 7.94891 20.921 8.13968 20.7803 8.28033C20.6397 8.42098 20.4489 8.5 20.25 8.5H3.75C3.55109 8.5 3.36032 8.42098 3.21967 8.28033C3.07902 8.13968 3 7.94891 3 7.75Z"
                  fill="white"
                />
              </svg>
            </span>
            <span>{dropdownText}</span>
          </div>
          {status && (
            <div className="dropdown-menu-list">
              <div
                onClick={() => {
                  setDropdownText("Best Match");
                  setStatus(!status);
                }}
                className="dropdown-menu-item"
              >
                Best Match
              </div>
              <div
                onClick={() => {
                  setDropdownText("Highest Price");
                  setStatus(!status);
                }}
                className="dropdown-menu-item"
              >
                Highest Price
              </div>
              <div
                onClick={() => {
                  setDropdownText("Lowest Price");
                  setStatus(!status);
                }}
                className="dropdown-menu-item"
              >
                Lowest Price
              </div>
            </div>
          )}
        </div>
      </div>
    </>
  );
};

export default App;
App.css
@import url("https://fonts.googleapis.com/css2?family=Rubik&display=swap");

* {
  font-family: "Rubik", sans-serif !important;
}

.container {
  width: 100%;
  height: 100%;
  position: relative;
  overflow: hidden;
  display: flex;
  justify-content: center;
  align-items: center;
  padding: 50px 0 0 0;
  flex-direction: column;
}

.dropdown {
  min-width: 204px;
}

.dropdown-button {
  background: #434343;
  border: 2px solid #000000;
  border-radius: 8px;
  padding: 8px 16px;
  font-size: 18px;
  line-height: 24px;
  cursor: pointer;
  display: flex;
  align-items: center;
  justify-content: start;
  color: #ffffff;
  margin-bottom: 8px;
}

.dropdown-icon {
  width: 24px;
  height: 24px;
  margin-right: 8px;
}

.dropdown-menu-list {
  background: #434343;
  border: 2px solid #000000;
  border-radius: 8px;
  padding: 8px;
}

.dropdown-menu-item {
  padding: 6px 8px;
  border-radius: 4px;
  transition: all 0.2s ease-in-out;
  color: #ffffff;
}

.dropdown-menu-item:not(:last-child) {
  margin-bottom: 4px;
}

.dropdown-menu-item:hover {
  background: #00c896;
  color: #ffffff;
  cursor: pointer;
}
Latest Status
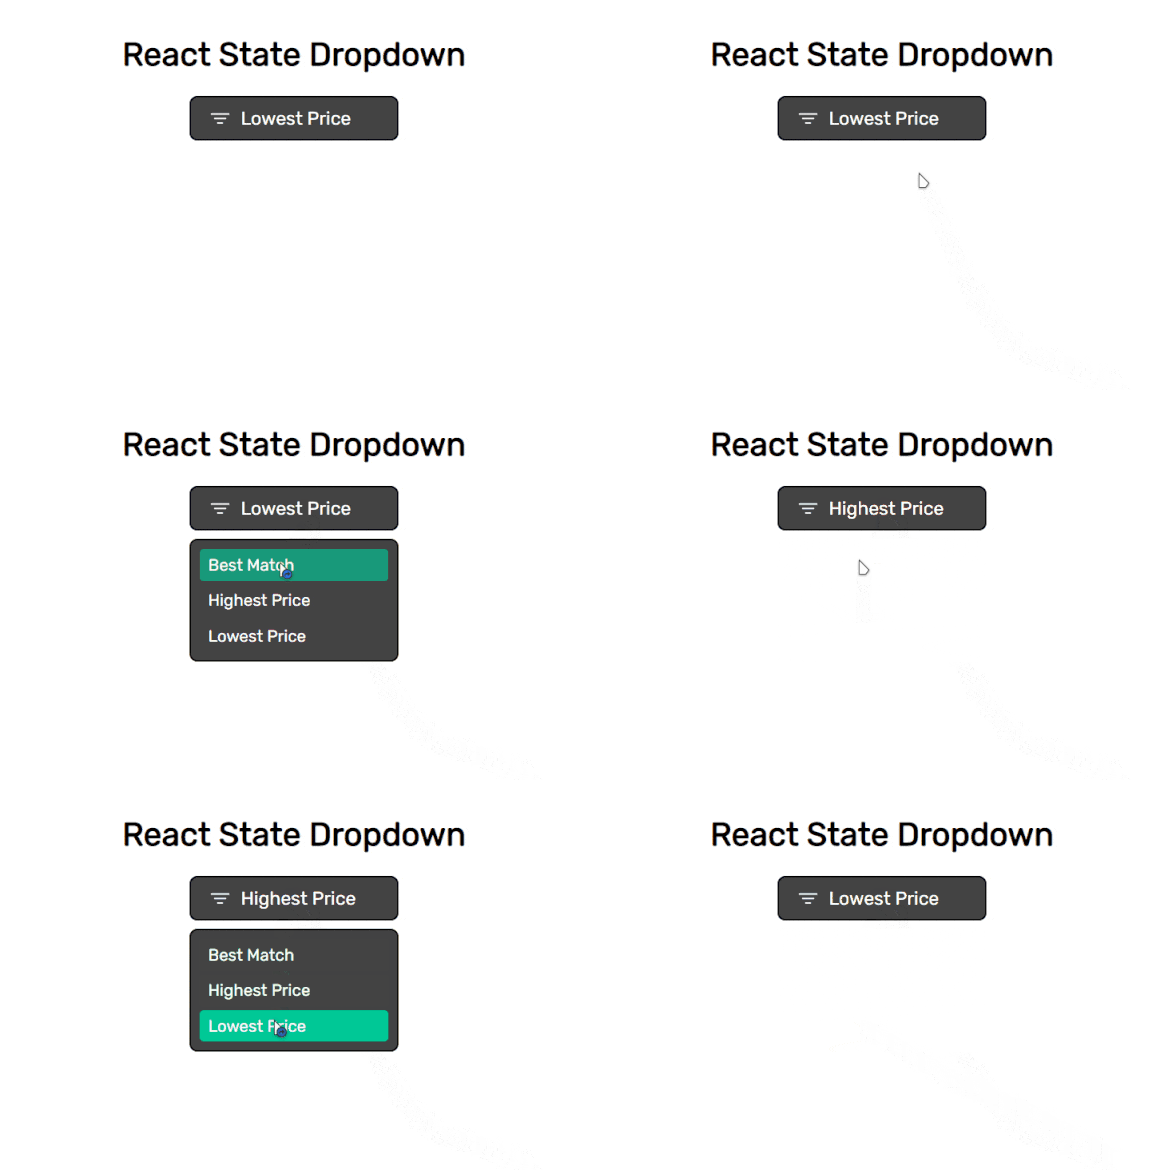
After making the above encodings, the output we will receive in the browser will be as it appears in the gif below.

It’s that easy to make a drop-down menu using the status method with React. I would also like to mention some structures that I have made, albeit small, in terms of useStade and coding.
useState(): The component is a React Hook tool that allows us to manage its global state.
setStatus(!status): Changing the stadium in this way will allow us to perform a toggle operation.
Yes, we have learned how to make a dropdown menu using the react state structure. See you in my next blog post… ?


